


Interesting links:
Sonnar 85mm f/2.8 review
Sonnar 85mm f2.8 samples
Sonnar 135/2.8 opinions
About Zeiss/Contax lenses
Contax 35-70 trounces all
Zeiss/Contax + Leica tests
Zeiss/Contax lens samples
Distagon 28mm f/2.8 review
Distagon 28/2.8 Samples
Sonnar or Planar 85mm?
Zeiss on Pentax Blog
Sonnar 85mm f/2.8 talk
Contax 35-70 samples
Planar 50mm f/1.7 test
Opinions on Contax lenses
PC-Distagon trounces all
The Zeiss look
135/2.8 stunning samples
Please visit our
Sony Feedback page
Our other products:


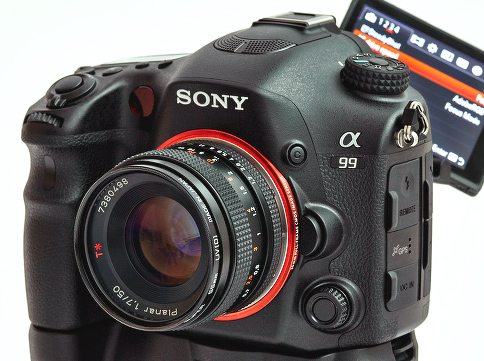
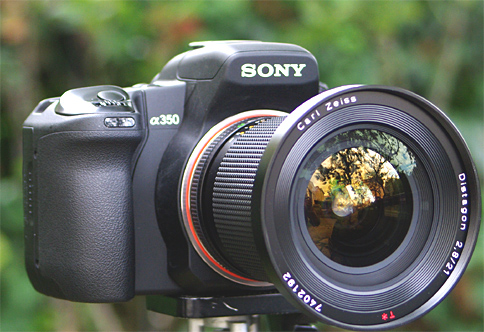
Welcome to Leitax, this is our Zeiss/Contax for Sony page. As you know, this site is focused to give more possibilities to our film or digital cameras and, finally, with our replacement bayonet, we can use a selection of Contax lenses on our Sony/Minolta cameras.
The same as with Leica lenses, this conversion is fully reversible and will not damage the lens nor the camera. The Zeiss/Contax lenses will focus to infinity, and, adding an appropriate chip to the bayonet, our cameras will give focus confirmation, will meter in Av mode (stop down), and will stabilize the Zeiss/Contax lenses.
Unfortunately, the Contax lenses present a variety of different bayonets models and sizes, and the gradation of difficulty goes from easy to almost impossible. So lets start with the easy ones, the Contax MM type with narrow diameter bayonet.
Please scroll down for the sales list and for the instructions
As far as I know, this is the complete list of Contax MM type prime lenses we can use.
MM lenses can be easily recognized as the smallest aperture on the scale is green.
| MM Distagon* | 18mm F4 |
| MM Distagon* | 21mm F2.8 |
| MM Distagon* | 25mm F2.8 |
| MM Distagon | 28mm F2.0 |
| MM Distagon* | 28mm F2.8 |
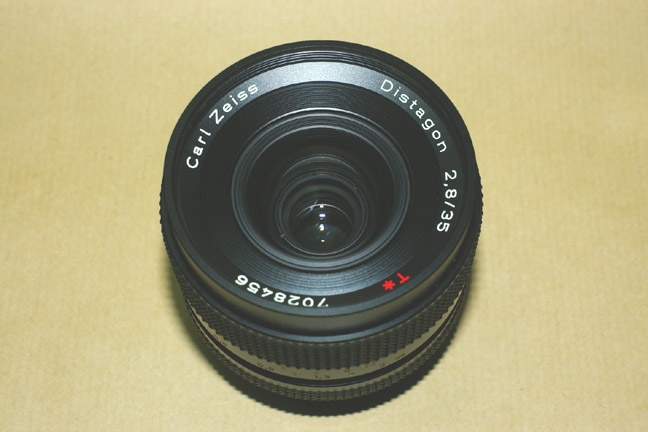
| MM Distagon* | 35mm F2.8 |
| MM Planar* | 50mm F1.7 |
| MM Planar* | 50mm F1.4 |
| MM Makro-Planar C | 60mm F2.8 |
| MM Sonnar* | 85mm F2.8 |
| MM Sonnar* | 100mm F3.5 |
| MM Sonnar* | 135mm F2.8 |
| MM Tele- Tessar | 200mm F4 |
The lenses marked with an asterisk * have been already tested. |
|
- Our customer and friend Lazare Caspi from www.monuniverspentax.com has found a simple way to use the Vario-Sonnar 3,5-4,5/28-70 on our cameras, please take a look here.
- I've tried the Vario-Sonnar 3,4/35-70 , which is said to be as good as primes, and this is the way to use it on a Sony camera.
Warning: this one is a bit risky, I would recommend only for professionals and really daring and advanced diyers. Take a look here.
- We can offer a Sony solution for the excellent perspective control lens PC-Distagon 35/2.8
- Our client and friend Laurent managed to install our Contax mount on his Vario-Sonnar 28-85
NEW! Conversion instructions for the Vario-Sonnar 80-200/4 and Vario-Sonnar 35-135
Questions? Info@leitax.com
- To have the Super Steady Shot system working properly, you'd have to order the correct chip with the max. aperture and focal length of your Contax lens pre-programmed in it.
- I recommend the more advanced chip (the thinner model -M42C) from James Lao http://www.eadpt.com/ , if you want me to glue the chip in your bayonet, please add "Leitax" in the text box when ordering in his web shop and he will send your chip to me. Or you can find him in Ebay ( james_dn )
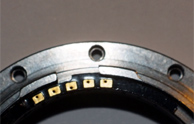
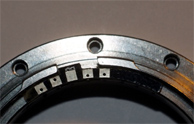
- To glue yourself the electronic chip, just support it to the left or to the right in the precisely machined slot on our Leitax Contax-Sony bayonet, depending of the chip model (take a look at the pictures below).
- The Leitax bayonet also accepts simpler chip models that you can find in Ebay.
- For metering, I use the stop-down method in Av mode, to have an accurate metering, remember to set the widest aperture on the Sony camera.
- NEW! I've discovered that my A350 can take pictures without the chip. In Manual mode, just turn the control wheel to set the speed and you will see the scale in the viewfinder showing the current exposure value.
In Manual mode, the camera will take the picture and will save it in the memory card. If you have a different camera model and can try it, please tell me if it works too.
But we don't have focus confirmation and the anti-shake works correct only for the 50mm default value.
Now you can order the Contax-Sony bayonet here.
Important Paypal Notes:
- We ship to all Paypal supported countries.
- I must ship to the address supplied to me by Paypal. I cannot ship to any alternative addresses.
- 21% VAT Tax will be charged by Paypal system to European Union customers
- If you don't receive my email after a purchase, it means Paypal failed to notify me, this happens rarely. Please email me if you don't get my complimentary note.
- Customers outside the European Union may be have to pay import duties.
- If you don't have a Paypal account, it is possible to pay with a SWIFT Bank Transfer or Western Union transfer.
Shipping:
- For postal shipments to the United States, import tariffs and brokerage fees are prepaid and will be automatically included in your PayPal checkout.
- Handling & Shipping (postal) cost for any quantity of items and to all countries: 17 Euros. It will be added automatically at the Paypal checkout.
Questions? Info@leitax.com
Top
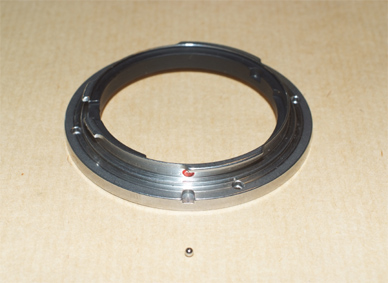 |
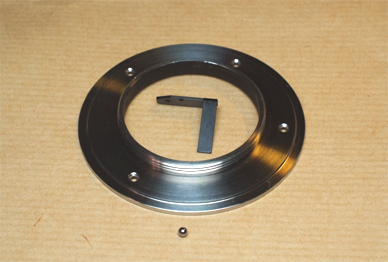
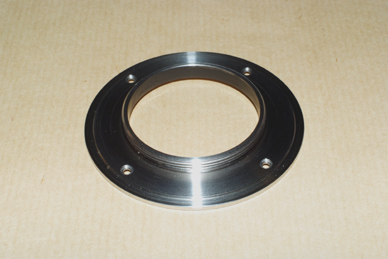
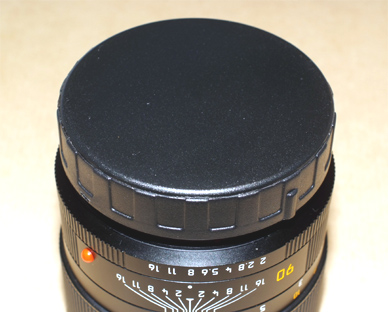
This is the Sony bayonet for Contax lenses with narrow mount. Also included a spare bearing ball just in case the one at the lens gets lost. |
68 Euro |
 |
This is our special Sony/Minolta bayonet-ring ensemble for the PC-Distagon 35/2.8 | Out of
stock 92 Euro |
  |
If you make your chip provider to send the chip to me.
I will glue it to your Leitax bayonet. Please mention it at the Instructions to merchant place in the Paypal order. |
Free service |
 |
This is the glue I use, it is strong and will not stick your fingers at once. | 7 Euro |
 |
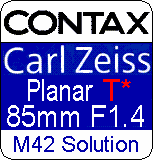
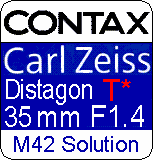
This is the M42 mount for the Carl Zeiss Contax Planar 85/1.4 and Distagon 35/1.4 MM Included a new aperture lever and a spare bearing ball. |
72 Euro |
 |
This is the M42 mount for the Contax teleconverters Mutar II and III. | 62 Euro |
 |
You may need a generic Sony/Minolta rear lens cap. | 2 Euro |
 |
But, if you want the best, I can offer now the OP/TECH
USA Sony/Minolta cap. -It has a rubber O-Ring that seals the lens from dust and moisture. -The O-ring also forms tight friction, it will avoid losing the cap. |
Out of
stock 9 Euro |
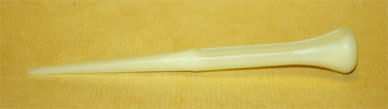 |
With certain models, we'll have to manipulate inside the lens, it's not a good place for something metallic. With this plastic tool I don't make any scratches in the Contax lenses. |
3 Euro |
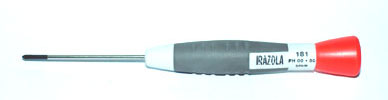 |
I use this model for all the Phillips screws in the Leica and Zeiss lenses, it is industrial grade quality made by Irazola, and the design is very good, you can push and turn it firmly with the rotary end and the rubber finish. |
9 Euro |
 |
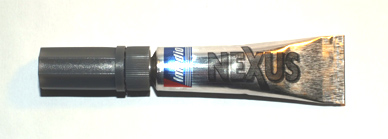
This silicone grease is necessary in case you find the lens' spring-ball system a bit dry. One tube is enough for dozens of bayonet replacements. |
1 Euro |
 |
Extra
shipping cost for fast courier. I would need your phone number for the courier shipping form. |
Contax MM lenses instructions :
All the MM lenses tested are identical inside, so the following instructions will work for all of them, and I am pretty sure, for all the rest.
 |
These instructions are valid for the MM lenses with
narrow mount only. |
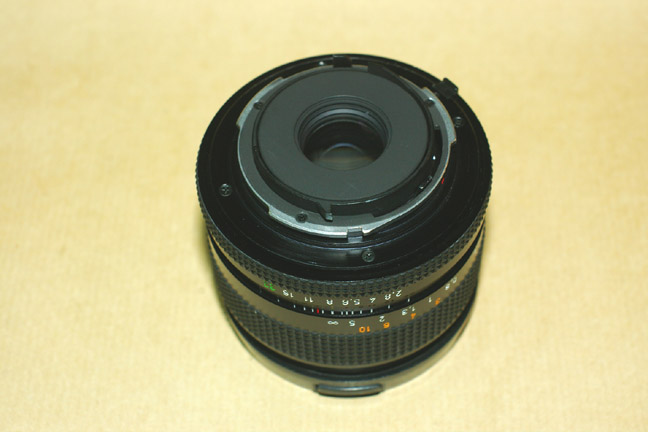 |
First, I would take a picture of the bayonet, so it will be easy to rebuild later |
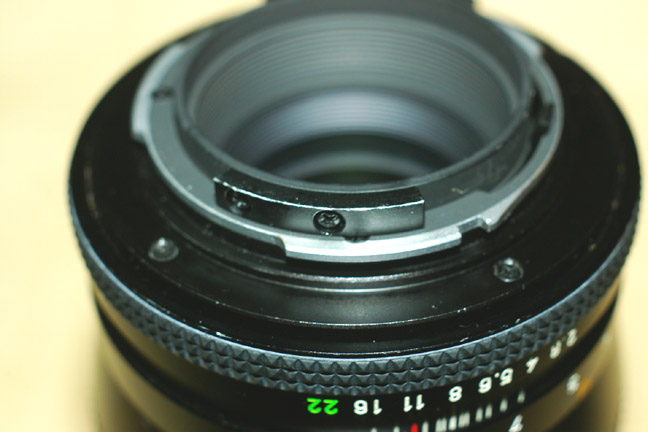 |
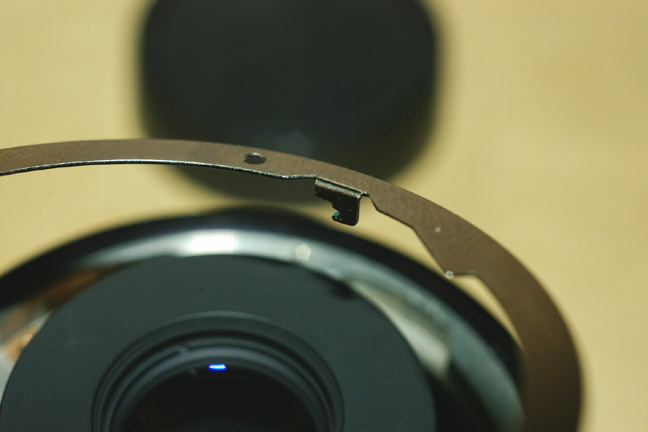
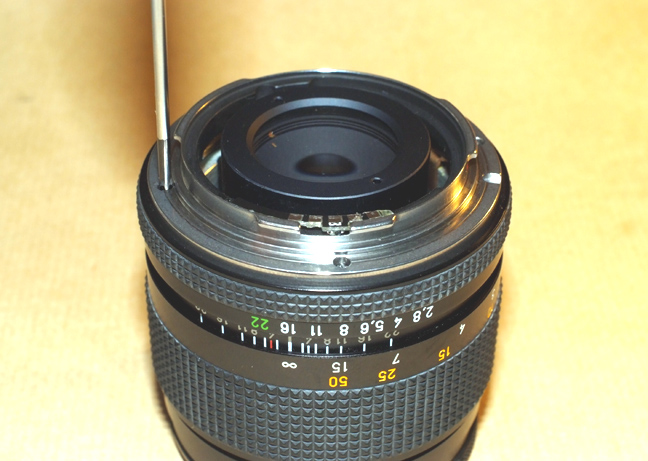
Some lenses have this curved piece here, we have to remove it. This one is the Sonnar 135mm. |
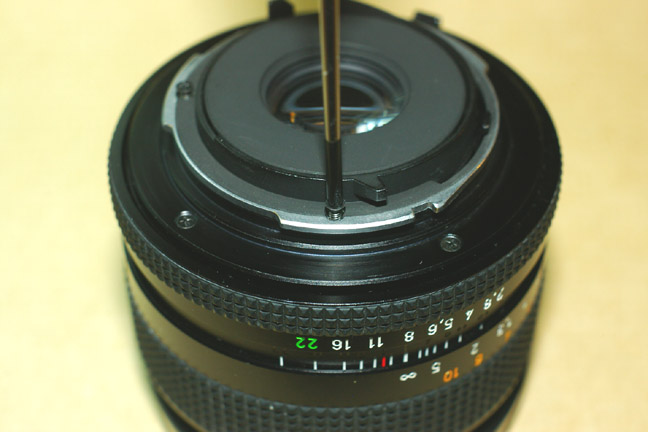 |
Now, unscrew the three upper bayonet screws. Use a good screwdriver, not those cheap ones from hobby shops, these screws are glued to the threads and it is necessary to make enough pressure and turn them carefully. |
 |
And remove it. |
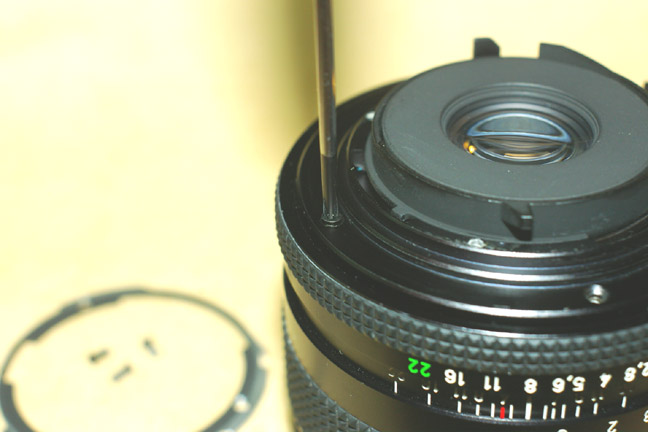 |
Now, unscrew the bayonet. |
 |
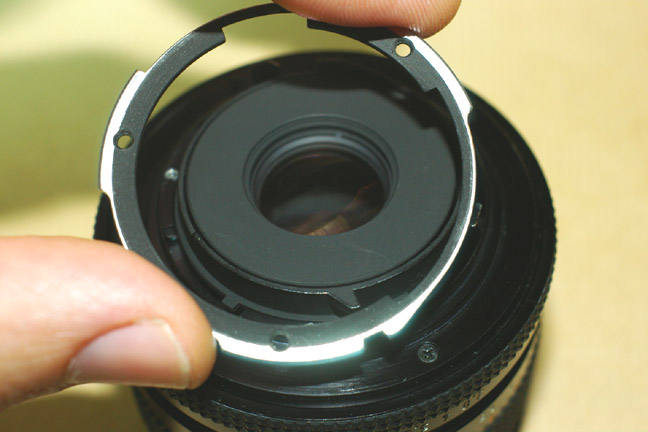
And lift the diaphragm ring together with the bayonet. Caution! Have the aperture ring in a middle position before lifting it, and lift it vertically without twisting it while lifting it, to avoid moving to the extreme side the internal iris mechanism, which could be difficult to put again in its place. |
 |
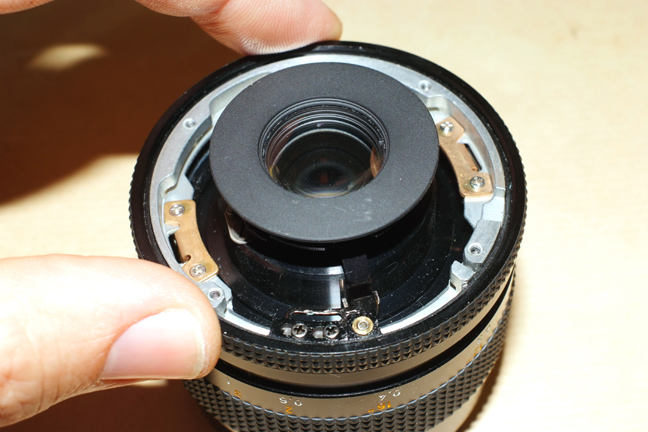
Ok, it's better to cover the lens meanwhile we are working on the ring. |
 |
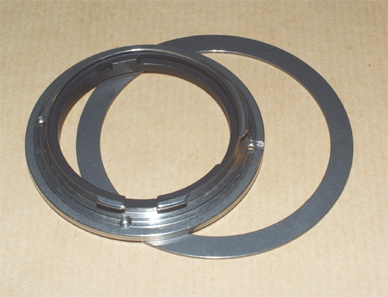
Now, we have to put the bayonet apart from the ring. |
 |
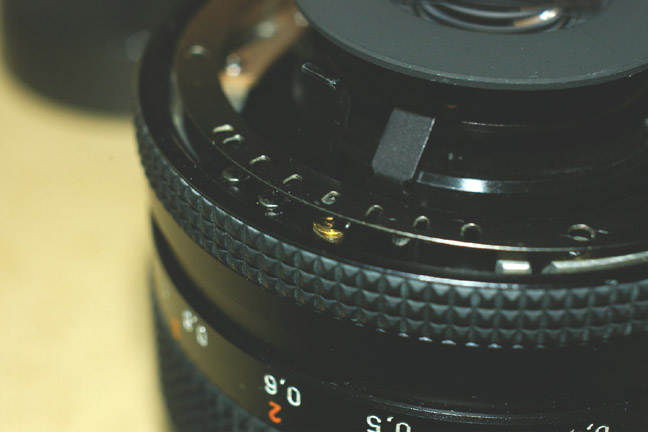
When they are apart, look for the bearing ball, it should be near its place, over the small spring. |
 |
Now look at this spring, we need to uncouple this side
from the hook. Usually, there is a bit of glue to secure it, don't pull the spring, it can be deformed or broken, just scratch patiently the glue with a pointed tool or a needle. |
 |
The spring is free now. |
 |
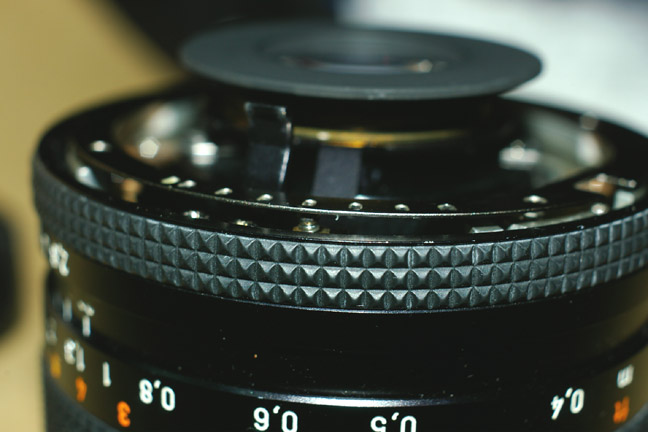
With the plastic tool, lift a bit the steel ring. |
 |
And push it to the right, so it can be removed from the Contax bayonet. |
 |
In
case the steel ring doesn't move to the right, it means it got glued
just under the square slot. This
is because they dropped glue over that screw and some glue went under
the steel ring. Also could be glued around the round holes, from the
bayonet screws. So we need to remove that screw and the square piece that it attaches . |
 |
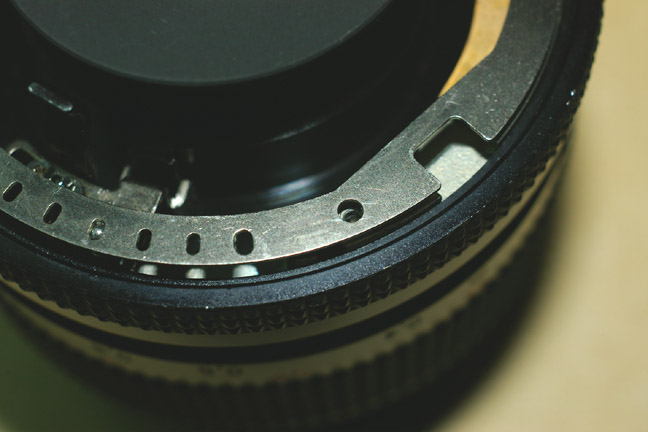
Now, to unglue the steel ring, use the plastic tool to
avoid scratches. Put it like the picture and turn it. Please don't try to remove the steel ring lifting it by the opposite side, you will bend it. |
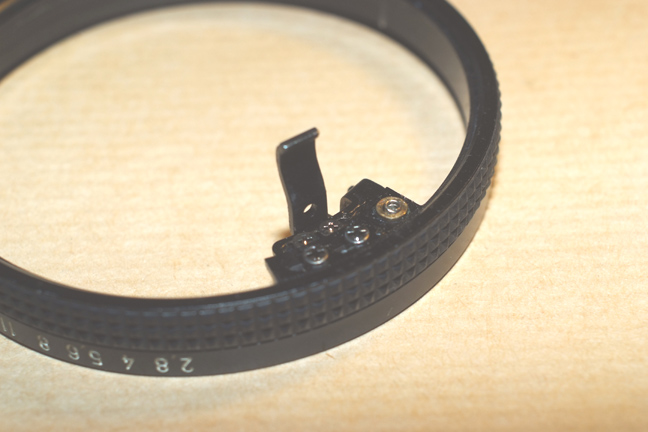 |
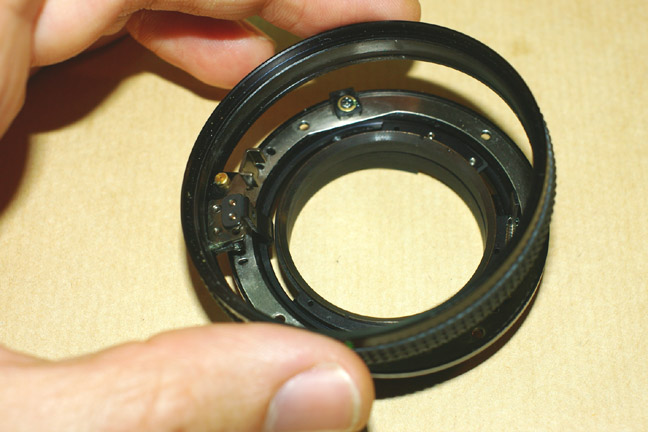
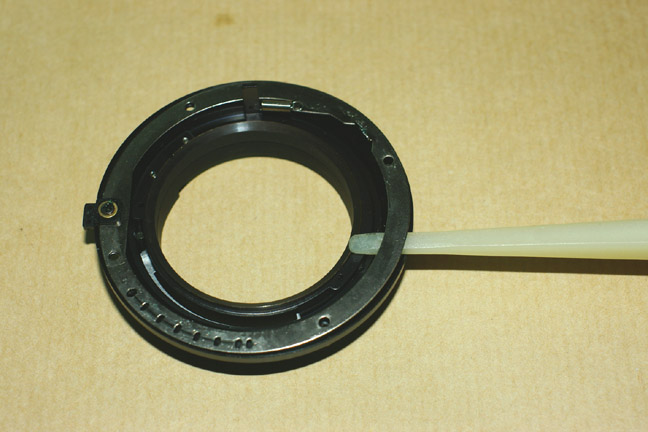
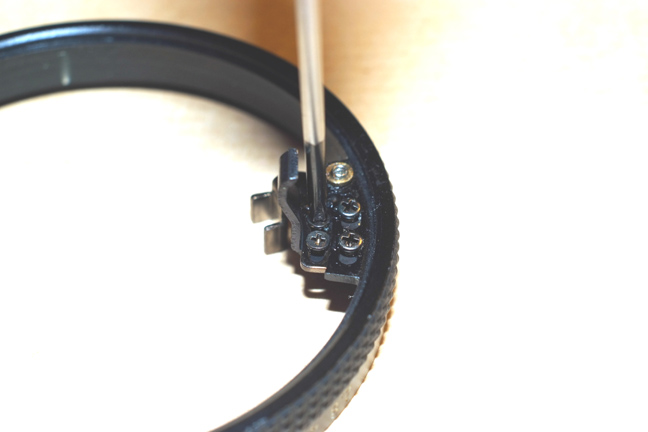
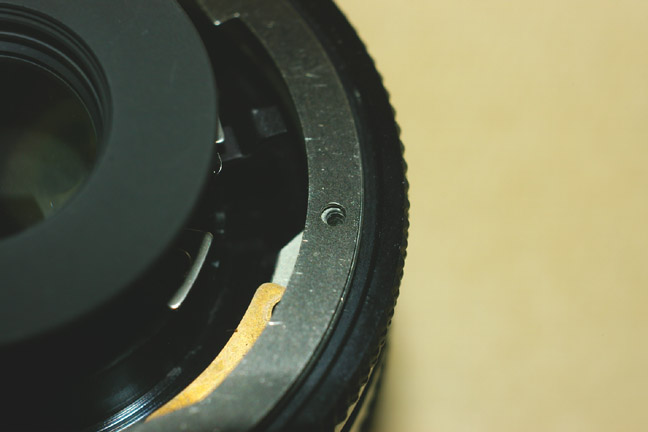
This lever will interfere with the rotating one at the Sony or Minolta camera. Also would interfere with the chip in case you install one. |
 |
This lever is attached with two screws on almost all
lenses. Please look here at the other type of lever's attachment. |
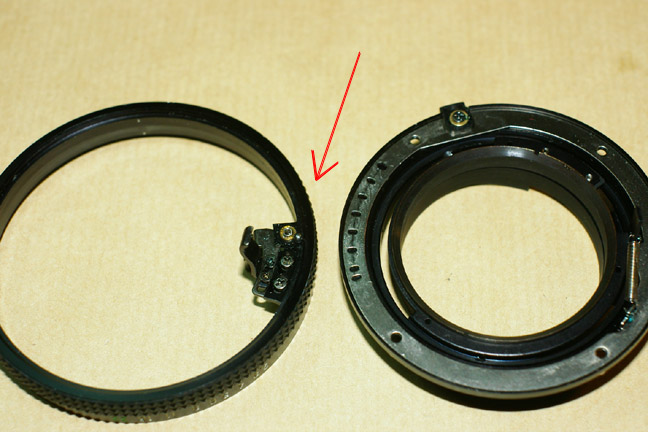
 |
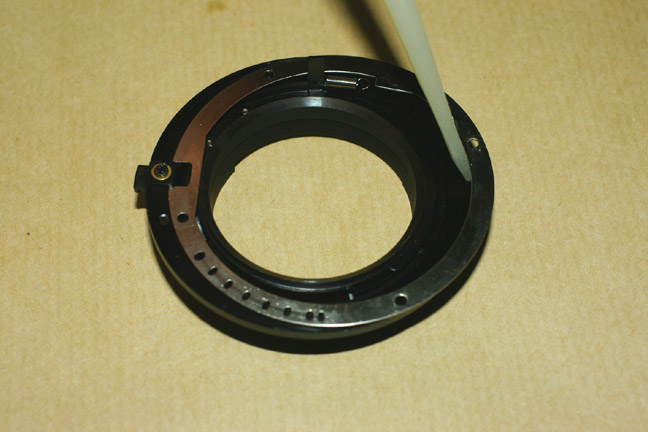
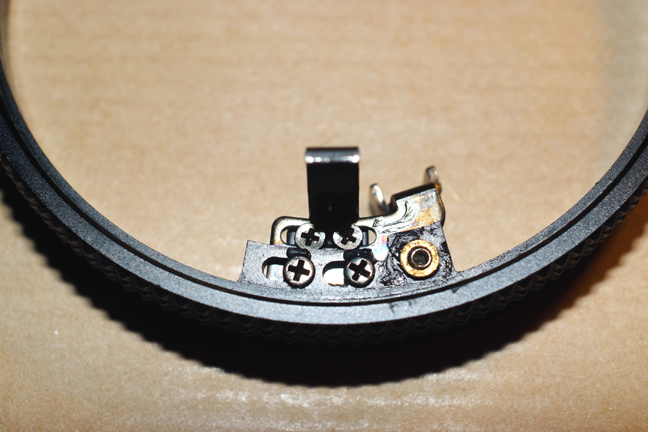
This is a rear view of the lever. |
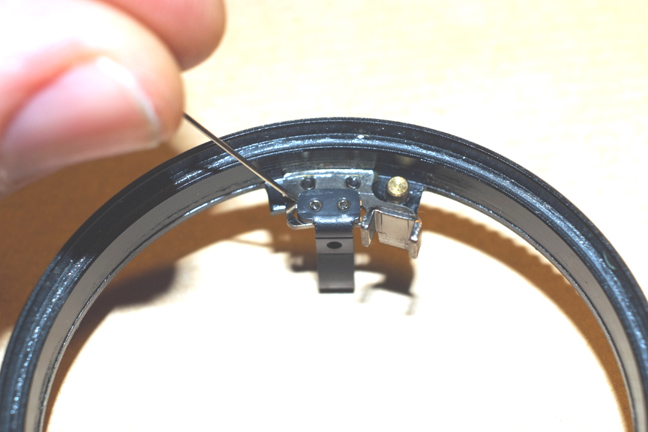 |
To be able to rebuild the lens exactly as it was, let's mark with a needle around the rear of this lever. |
 |
An now we can unscrew it. |
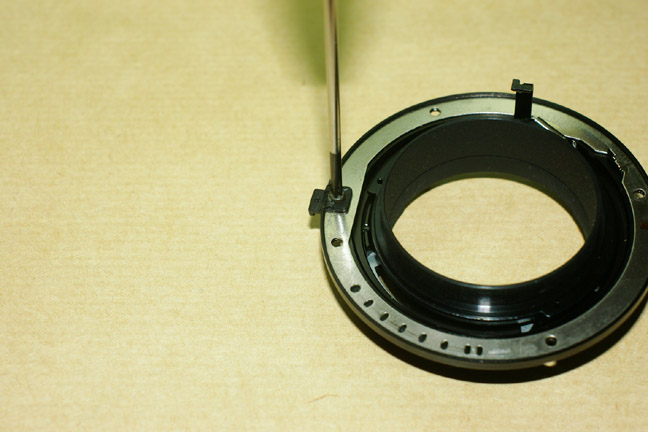
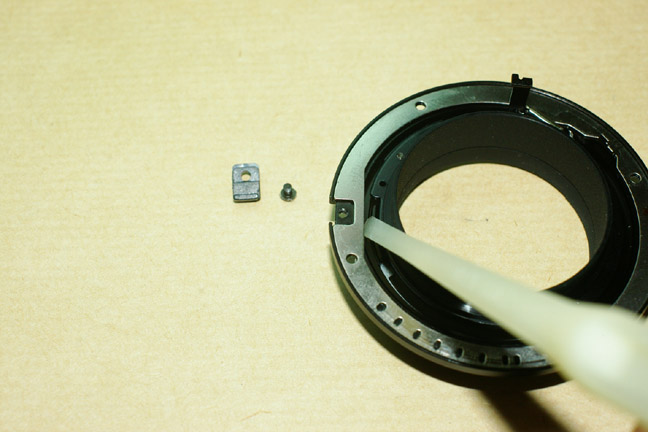
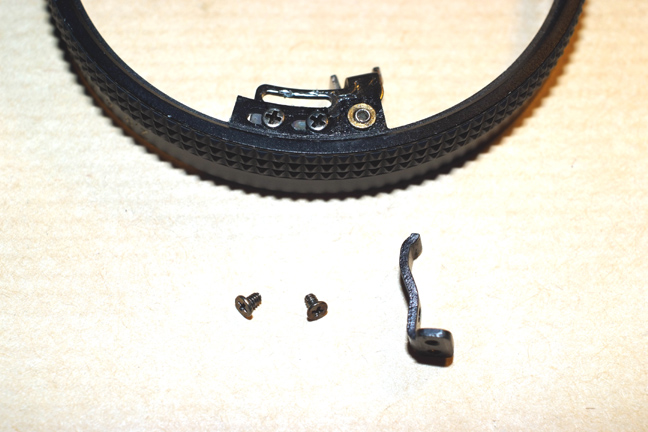 |
The lever and screws are out, please save them in the provided small plastic bag |
 |
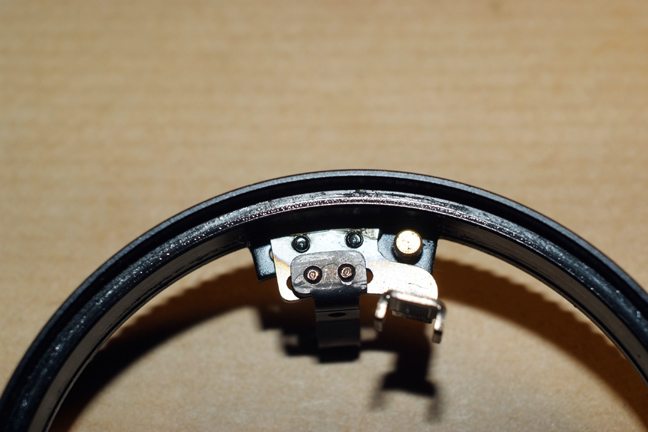
Here you can see the mark I did with the needle, now we can replace the lever exactly at the same place if ever needed. |
 |
Put
the diaphragm ring on the lens, you will see a lever inside that
commands the blades, which goes inside this u shaped piece of clear
metal. Now you must be able to open and close the diaphragm rotating the ring. |
 |
Put a little bit of the special grease on this small spring, so the bearing ball will get sticked to it. |
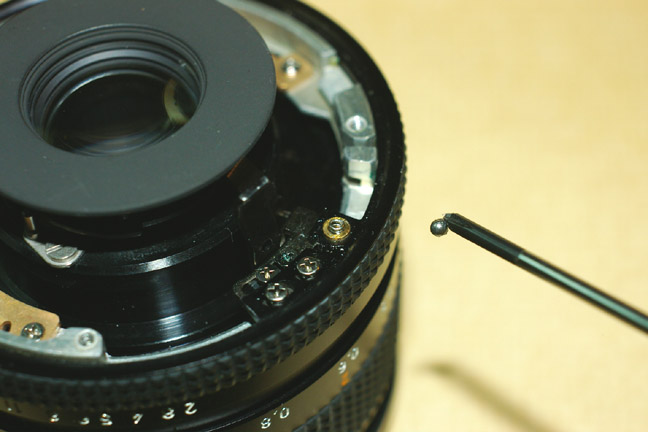 |
Bring the small ball to its place , better don't use tweezers , the tip of your screwdriver with some grease will not lose it, |
 |
And the ball is on the spring, leave an small amount of grease on the ball. |
 |
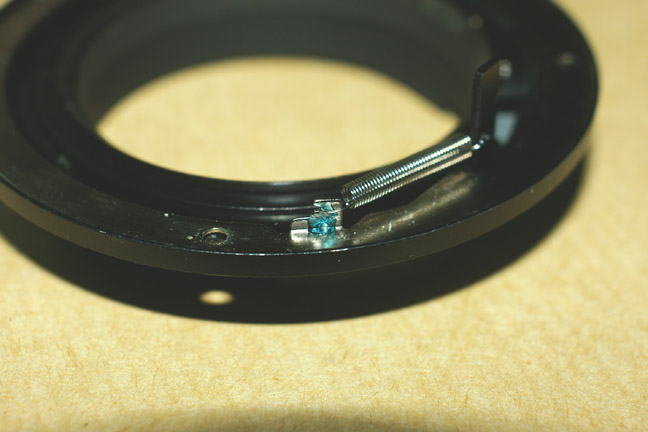
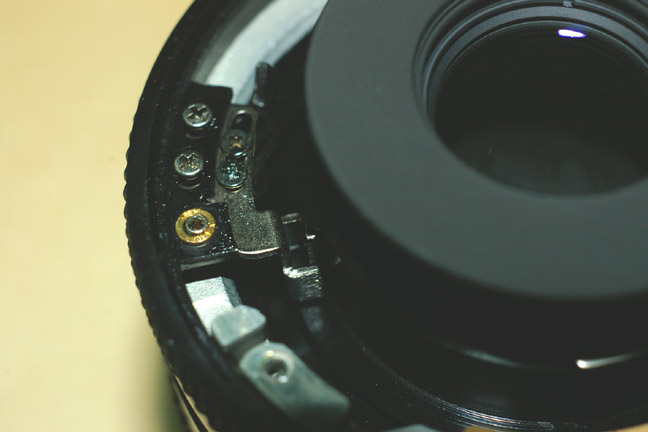
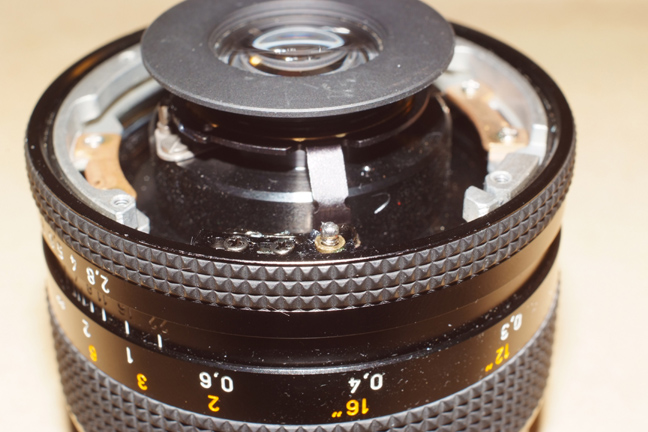
Now it's time to put the steel ring, notice the hook goes downwards. |
 |
And this square slot goes here. |
 |
Turn slightly the diaphragm ring so the small ball will coincide with one of oval shaped holes. |
 |
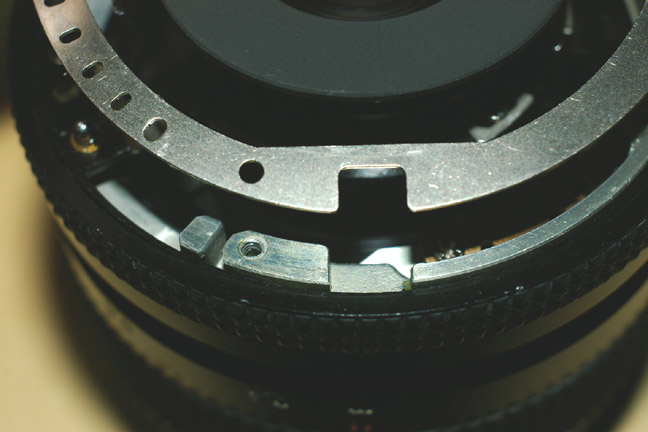
Another view of the small ball and the steel ring on it. |
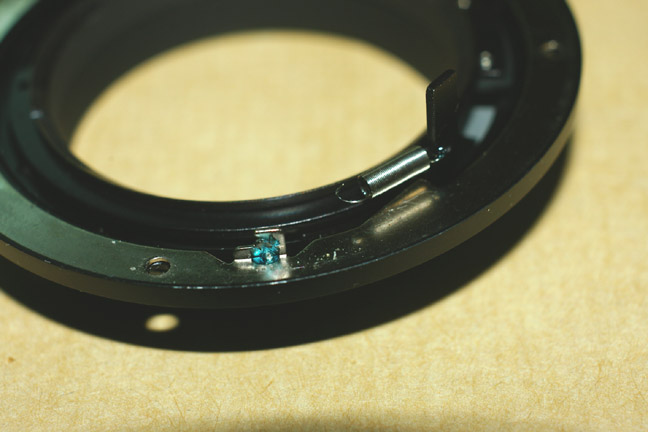
 |
Here you can see all is in correct position, the small ball, the round hole for the screw and the square slot. |
 |
And the rest of holes too. |
 |
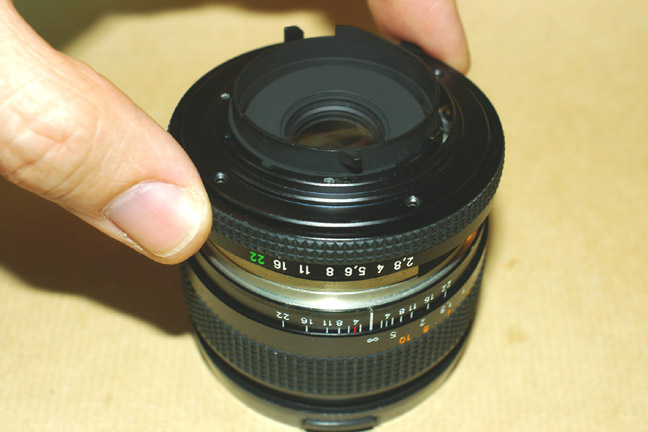
So we can install the new Sony bayonet, be careful
now, first find
the correct position looking at the chip machined slot in the bayonet,
it goes in front the lens
scale center. Then check if the screw holes are well aligned, and finally put the Sony bayonet lowering it vertically. And, finally, tight the four screws in cross pattern |
 |
So we can use several Zeiss/ Contax lenses on our Sony and Minolta cameras. |
Back to Leitax home |
Top |